Network Shares of ISIMA/LIMOS✯
Network shares are available on ISIMA/LIMOS workstations. They are primarily intended for administrative staff.
List of Network Shares✯
| Name | Note | Letter |
|---|---|---|
| administration | H: |
|
| communication | Z: |
|
| direction | D: |
|
| edt | formerly timetable - academic affairs | E: |
| gestion | formerly accounting management | G: |
| gestion-limos | J: |
|
| institut-formation | I: |
|
| langues | L: |
|
| limos | M: |
|
| scolarite | O: |
|
| secretariat | T: |
|
| securite | U: |
|
| services-techniques | Q: |
|
| stages | S: |
It is possible to access these shares from your workstation provided you are connected to the network (i.e., in your office or via the VPN) and have the necessary credentials.
Authentication is always done with your UCA account
Access with Windows✯
For Windows workstations in the 'LOCAL' domain✯
By default, all Windows workstations are in the LOCAL domain (unless specifically requested otherwise)
Quick Method
All Windows computers in the domain receive a GPO that automatically mounts the correct network drives.
Type gpupdate /force in the Windows search bar; this will restart the GPO within a few seconds, and you will find the administrative drives for those who have access (a restart may be required).
Complete Method
Open Windows Explorer
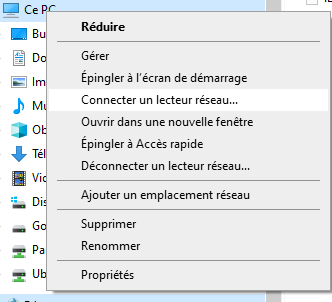
Right-click on Computer and select "Map network drive"
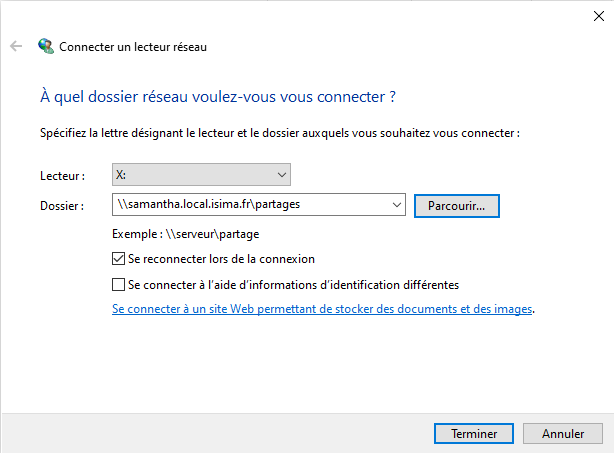
Select a letter for the drive for the folder, type \\samantha\Partages and click on "Browse"
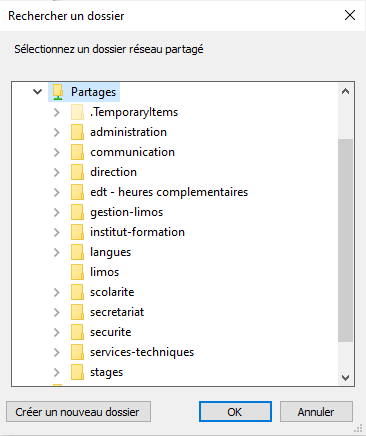
Expand local.isima.fr to find your network share.
and VALIDATE by clicking on "Finish"
Make sure to check "Reconnect at sign-in"
For workstations outside the domain (same procedure as above, only the authentication changes)✯
The procedure is the same as for Windows workstations in the 'LOCAL' domain except for the window "Which network folder do you want to connect to?"
Compared to the screenshot above, you must...
- Also check "Connect using different credentials"
- As login, you must indicate the domain name in the form of adding
@local.isima.frto your UCA accountLogin_UCA@local.isima.fr Password
Access with macOS✯
To mount a network drive from a GNU/Linux system, the easiest way is to use the Samba protocol.
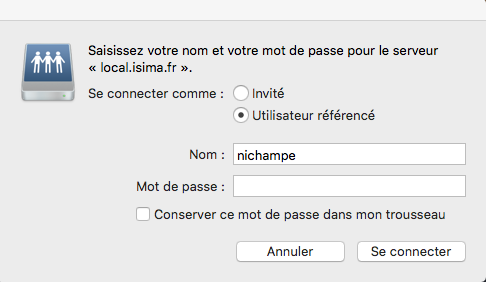
You will need to provide the server you want to connect to with the share path as well as your ENT username and password.
The procedure is similar whether you are accessing administrative shares or your personal directory.
Open Finder, in the menu bar click Go then Connect to Server...
Network drive for shared documents (administrative)✯
Enter this address:
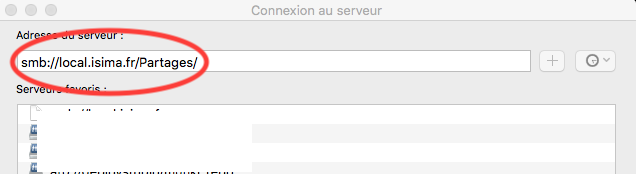
Click on the " + " to save the server connection.
Remember to check "Add this password to my keychain"
Access with Linux✯
To mount a network drive from a GNU/Linux system, the easiest way is to use the Samba protocol.
You will need to provide the server you want to connect to with the share path as well as your ENT username and password.
The procedure is similar whether you are accessing administrative shares or your personal directory.
The procedure is described for several file managers. See below.
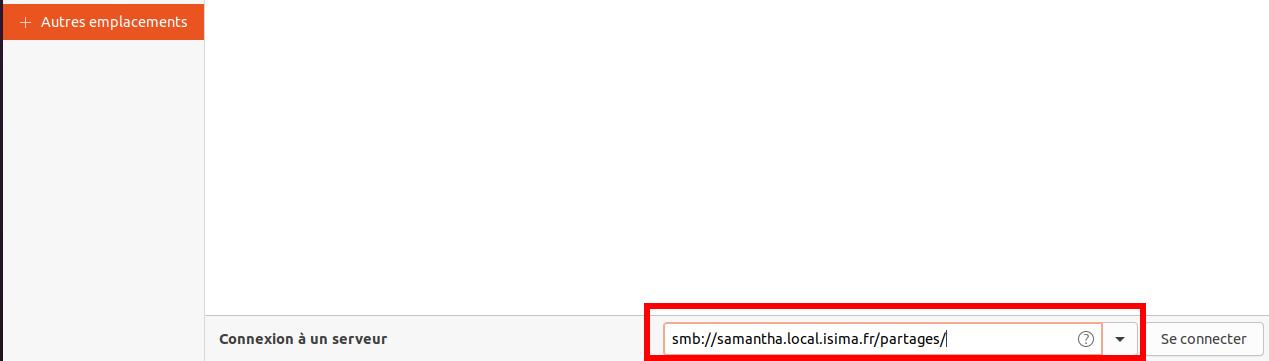
Use the URI (server address): smb://samantha.local.isima.fr/partages/<share_name>
- Username: username@local.isima.fr [ where username is the ENT one ]
- Password: [ the ENT one ]
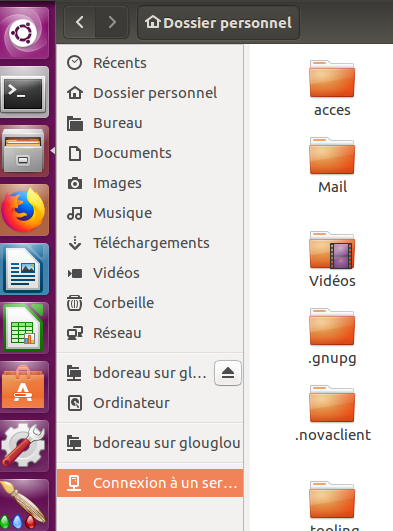
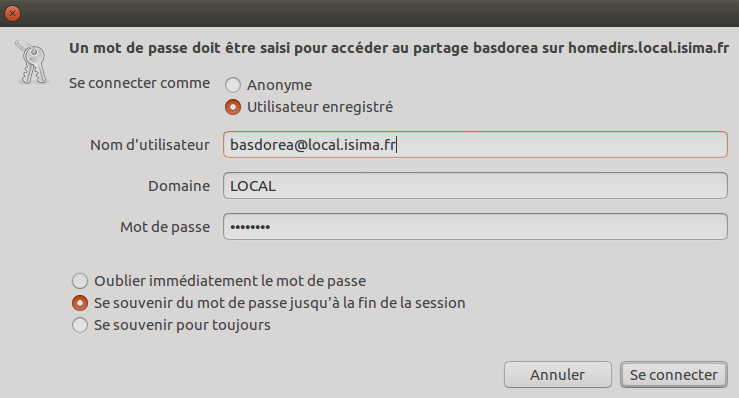
With the file manager (Ubuntu)✯
Open the file manager and click on "Connect to Server"
In the server address, type smb://samantha.local.isima.fr/partages/ followed by the network drive letter to mount, for example smb://samantha.local.isima.fr/partages/<share_name>/administration
- In the next window, indicate that you are connecting as a "Registered user"
- Then enter your UCA@local.isima.fr ID
- The domain is
LOCAL - Then enter your UCA password
- Finally, select "Remember forever"
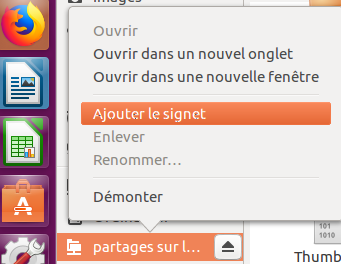
Once the connection is established, select your drive in the file manager, right-click and click on "Add to bookmarks"